Part of the Smithy Forms plugin. This page covers everything under Smithy Factory → Forms & PDF and → PDF Content — fonts, page format, and the two ways to build a PDF’s content — plus the Smithy PDF form action that actually attaches one to a submission. If you haven’t turned PDF features on yet, see the First run section of the Smithy Forms overview first.
Font Management
mPDF (the PDF library this plugin bundles) needs a core set of fonts before it can render anything. Download them from Font Management on the Forms & PDF screen — it’s about 5MB, and it saves to wp-content/uploads/sf-pdf-fonts/. Skip this and PDF generation simply won’t work; there’s no separate error, mPDF just has nothing to draw with.
Once the core fonts are in, add any custom font you want: choose the file, give it a Font Name, and click Upload Font. Two things worth knowing before you try:
- OTF fonts with PostScript outlines aren’t supported by mPDF. Not every OTF has PostScript outlines, but plenty do — if a font doesn’t render in your PDFs, that’s the first thing to check. Stick to TTF, or convert the OTF to TTF (FontSquirrel’s converter works fine for this).
- You can’t just copy a font file into sf-pdf-fonts/ by hand. Use the uploader — it’s what registers the font with mPDF properly.
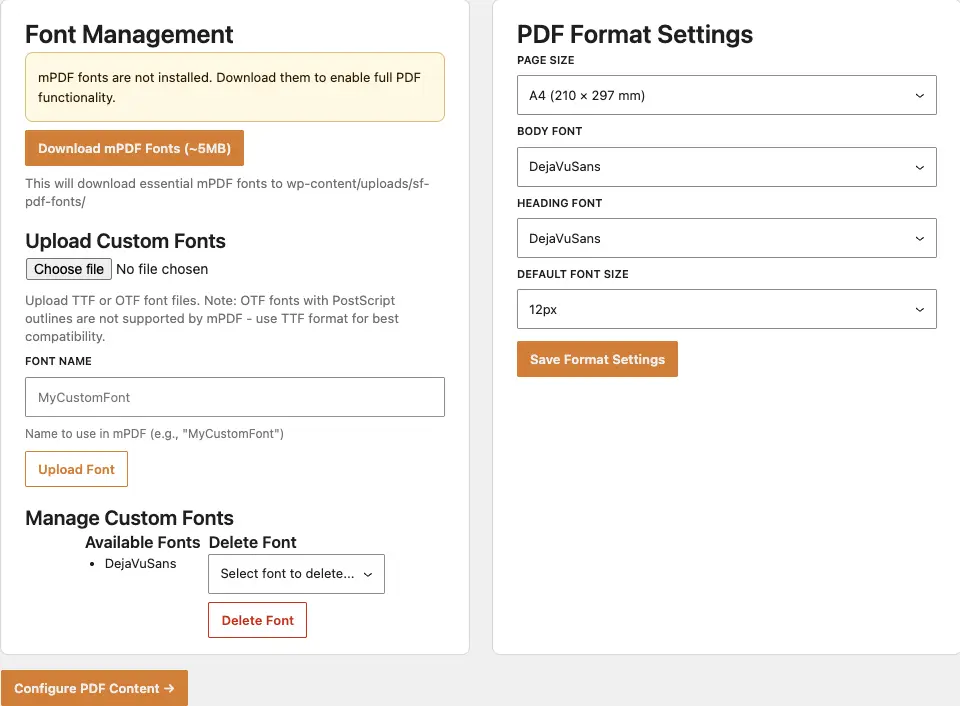
PDF Format Settings
The right-hand panel next to Font Management sets the defaults every PDF starts from: Page Size, Body Font, Heading Font, and Default Font Size. These matter most for the “editor” content mode below — the manual, no-template PDFs where you’re relying on these defaults rather than your own CSS. If you switch to a custom HTML template, your template’s own styling takes over and these become fallbacks.
PDF Content
Configure PDF Content (its own submenu item, or the button at the bottom of the Forms & PDF screen once features are on) decides what actually goes inside the PDF. There are two modes, on tabs at the top of the screen: Use editor below, and Use custom template file.
Editor mode
A familiar classic-editor interface for writing the PDF body directly. Tick Disable automatic paragraph formatting if you want precise control over your HTML structure without WordPress adding its own <p> tags around everything.
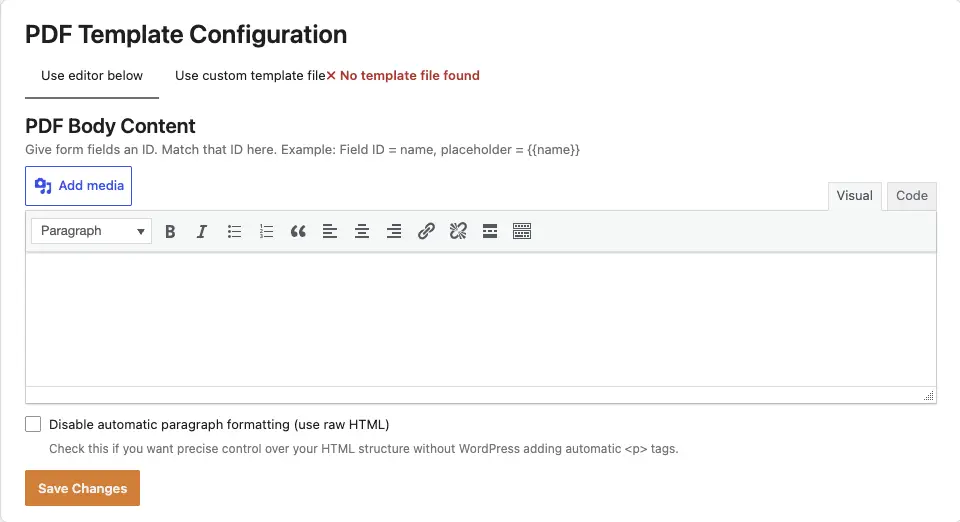
In either mode, pull a submitted value into the PDF by wrapping the form field’s ID in curly braces: {{ field_id }}. Use the field’s ID, not its label — check the field’s Advanced settings in the form builder if you’re not sure what it is. For example, a field with ID name becomes {{ name }}, and it’s replaced with whatever that field’s value was on submission. You can drop in images the same way (a footer logo, say); if the content overflows a page, mPDF just adds more pages rather than clipping anything.
Custom template mode
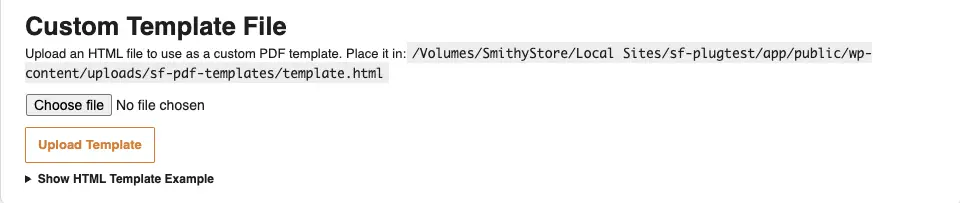
For full control, switch to a custom template: build a whole HTML file for the PDF and upload it. Use Show HTML Template Example on the screen for a starting skeleton — it drops in the same {{ field_id }} placeholders as the editor mode above.
Treat the template as a print-intent web page, not a responsive one: set sizes in fixed units (px, mm, in, em, rem) and expect no responsive behaviour at all. A 1920px-wide div on an A4 portrait page will simply get cut off — A4 is 595px wide. mPDF understands most basic CSS but struggles with anything modern like flexbox or grid; if you need the full picture of what it supports, mPDF’s own documentation covers it in more depth than is worth repeating here.
Using it in a form: the Smithy PDF action
Everything above configures what a PDF looks like. To actually generate one, add Smithy PDF as an Actions After Submission item on a Breakdance form — right alongside Email or Store Submission.
Think of Smithy PDF as a file upload, not a destination in itself: it produces the file, but doesn’t do anything with it on its own. Pair it with the action that should receive it — add an Email action and choose “attach uploaded files” to have the PDF emailed to you, or add Store Submission and choose “Store Uploaded Files” to keep it with the submission record. When it’s attached to a submission, the PDF is saved in Breakdance’s secure folder and shows up as a download link on that submission’s admin page. One current limitation: Form2PDF doesn’t support “add to media library” — if you need that, it’s on the roadmap.
The Smithy PDF action has its own small options popup:
- Filename — type a name, or use a form field as a token (e.g. {name}).
- Add Timestamp to Filename — on by default. With it on, {{ name }} plus a timestamp keeps two submissions from the same “John Smith” overwriting each other’s PDF.
- Run Action Conditionally — the usual Breakdance conditional-logic option, if you only want the PDF generated in certain cases.
Screenshot of the Actions panel and the Smithy PDF options popup reserved here — pending.
Common questions
I turned on PDF features but nothing seems to happen on submission.
Two separate things need to be true: the core mPDF fonts need to be downloaded (Font Management), and the form itself needs Smithy PDF added as an Actions After Submission item — enabling the feature in settings doesn’t attach it to any form automatically.
My custom font uploaded fine but isn’t showing up correctly in the PDF.
Check whether it’s an OTF with PostScript outlines — mPDF can’t read those. Convert it to TTF (FontSquirrel’s converter is a quick way to do this) and re-upload.
My PDF layout looks broken or cut off compared to the web page it came from.
mPDF renders your template as a fixed-size print page, not a responsive one, and it only understands basic CSS — flexbox and grid layouts won’t work. Rebuild the template with fixed widths in mm/px/in rather than percentages or flex containers.