The Filterable Table element uses list.js to add search and sort to a dynamic table. It can get data from manual entries, repeaters or post queries.
If you know about dates and what a pain-in-the-arse they are, you can skip past that bit. Sorting dates though… always the worst!
Type
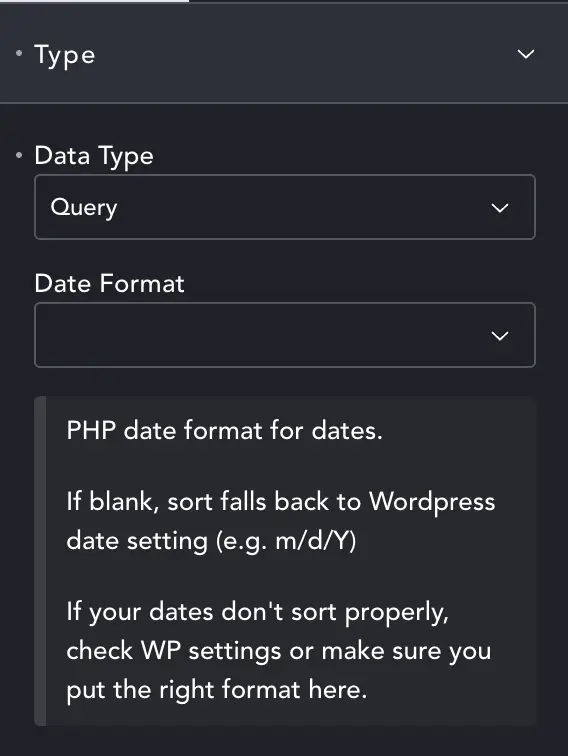
Data Type – Select where to get the data for your table:
Default – enter the data one item at a time.
Repeater – ACF or Repeater fields source.
Query – Post query.
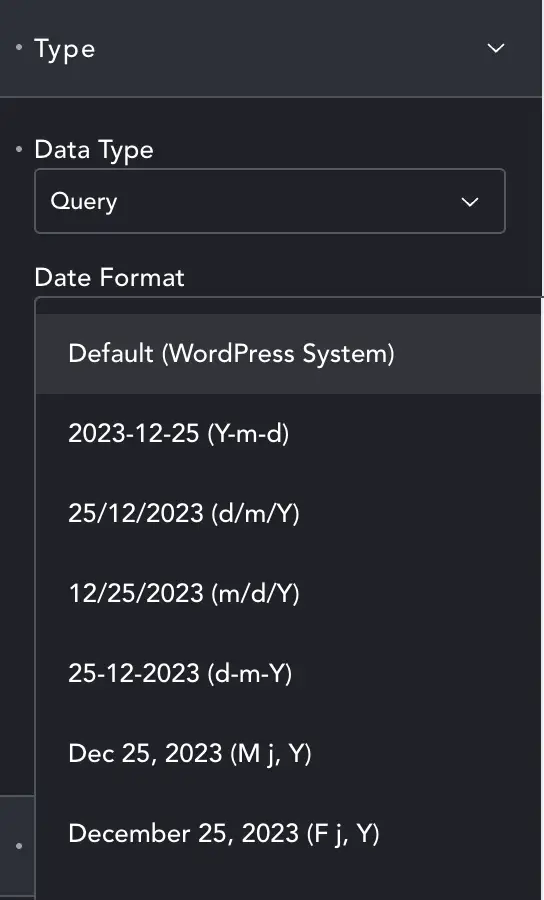
Date Format – Choose the format your dates are in. With post types and default post-dates this is usually the WordPress format found in Settings (e.g. m/d/Y ).
A long boring look at dates.
Generally posts return their date in the WordPress format. The date options for Filterable Table include comprehensive options to cover the majority of cases. When fetching posts you can usually leave this blank for default.
If you find you are trying to sort by date and either they sort in a strange order, or they won’t sort at all, it will be a date format mismatch. Check your system date in WordPress matches the date format of your data. For example, is ACF/Metabox returning in the same format as the WordPress system? If not, set a date format here to match ACF/Metabox.
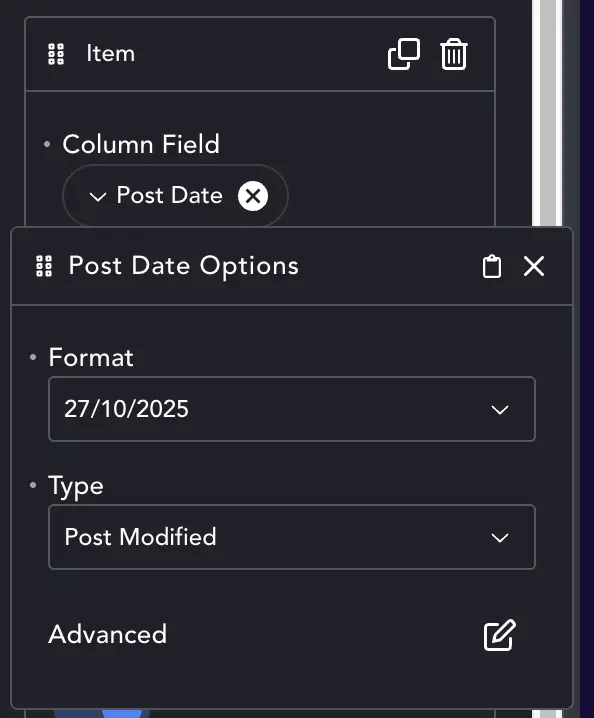
Of course, there’s always some other sneaky bastard messing with your dates. In this case, it’s the default Breakdance date return format.
When you add a dynamic date field, like post-date, Breakdance automatically changes the format. Even if ACF is returning the right format, and you’ve set the format in the table options, this can trip you up.
After adding the date field (see below) click the dynamic data options and check the date format there. It also needs to match. Complicated nonsense I know, but don’t blame me! Let the haunted expressions on the faces of coders and Excel users around the world tell you what dealing with dates does to you.
Query Type
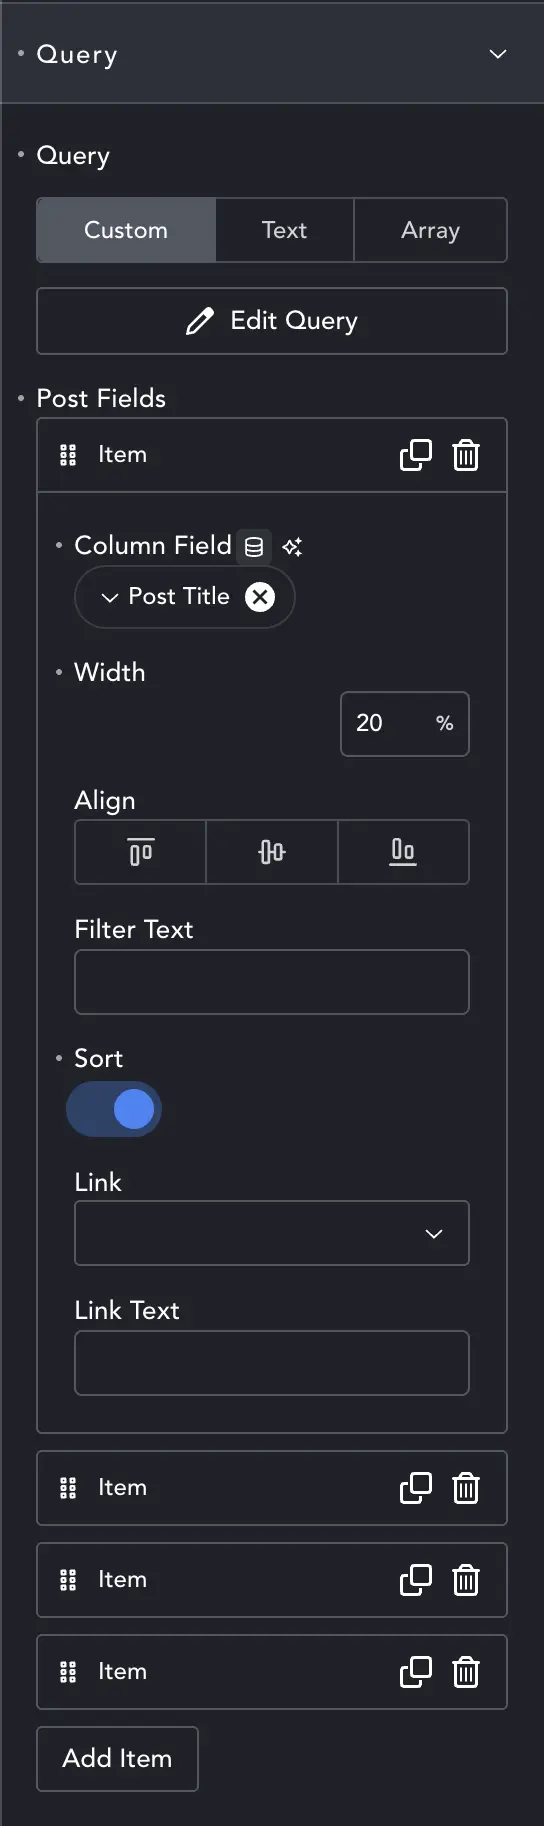
After selecting Query as your Data Type you’ll see the Query tab in content settings. The Query itself is the native Breakdance query – set it as normal. Set number of posts to either the number you want (e.g. 50) or -1 (all the posts).
Use Add Item to add your first column for the table. Each item uses the native Breakdance dynamic data modal to pick the field.
You’ll see a Column Field but don’t fill it in. Click the dynamic data icon and select the field you want from the Breakdance dialogue.
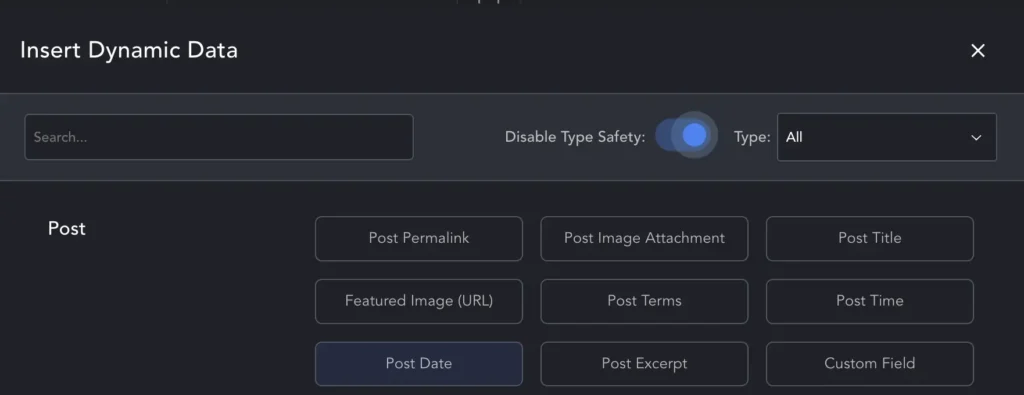
Not all fields will show. You can find them by selecting All from the top-right drop-down, and then enable the Disable Type Safety toggle. Now you should see all fields, including featured image and any fields you’ve added with ACF/Metabox etc.
You can also change settings for each field as with standard Breakdance dynamic fields. For images you can set size, for text you can set max characters, and of course for dates you can choose the display format. Make sure dates match!
Use Width to set column width, and the Alignment options to set cell alignment.
Filter Text – When Sort is true, a button will appear above the table that users can click to filter on that column. If your field is ‘Post Extract’ you might prefer just ‘Content’ for a button label. This also acts as the column header.
Sort – When enabled, this becomes a searchable, sortable column. I little ‘double arrow’ will appear in the header which controls sorting.
Link – If your field is a URL you can set Link to Link, Link New Tab or Download. Links are styled into buttons (with Link Text label), Downloads are buttons with the download attribute added.
Repeater Type
Selecting Repeater as the Type will change the Query dialogue to show a dropdown. From here you can select the repeater that will feed the table.
The remaining options are the same as with Query type above.
Default Type
If you have the patience of a Saint or a lot of time on your hands, you can add data manually. This is especially useful if you haven’t found a hobby yet, or some bewildered and wealthy lunatic has offered you many coins for the work.
Headers
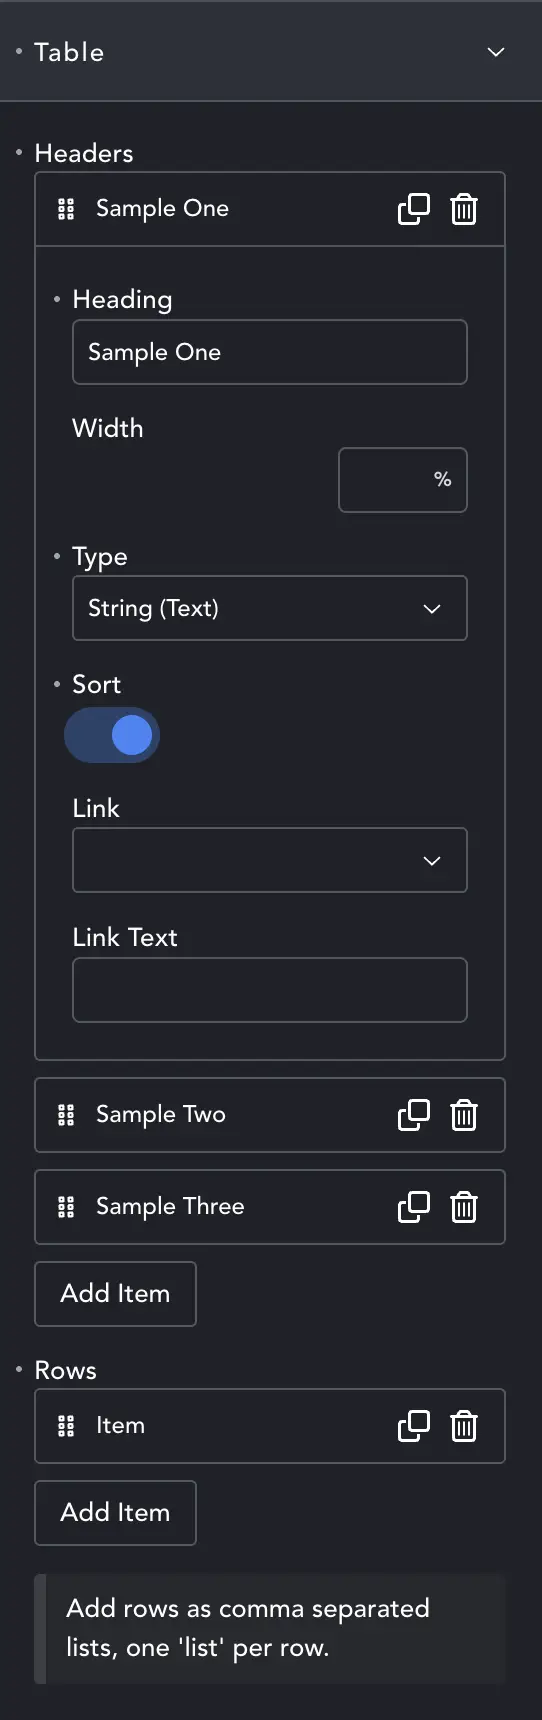
In manual mode, you need to setup headers for your table. Each has a Type which can be string, date or number. The Sort and link options are the same as above.
Add all the headings you need. Then below you can add rows.
Each row has only one field. This is for a comma delimited string of data, such as: “01/02/26, Why am I doing this, Oh my God look at all this data entry, Shoot me now“
The number of items must match the number of headers. Leave a blank if the item has no data for an entry, like this: “02/03/27, I trained years for this,,what a wasted life“
There are fewer options as I couldn’t imagine anyone having the will to use it when you’ve got repeater and post options. But who am I to know the ways of this world. Do you use this option? Do you want more choices? Either contact a therapist, or drop me an email and I’ll consider any reasonable request to enhance the table element.
Category Filter
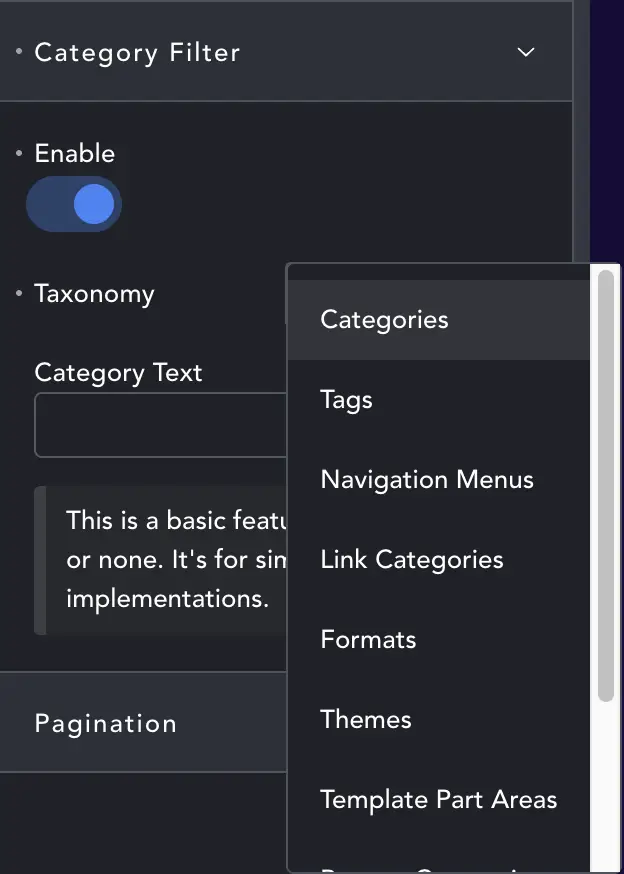
When using the Query type you will see an extra tab for Category Filter. Here you can choose the category that matches your post-type. The categories will then be displayed as buttons above the table which can be used to filter posts/rows.
Category Text – is the label for the filter above the table.
Do I need to tell you that this must be Enabled first? With the little button clearly marked Enable? I really hope not.
This will show all categories, with no options to exclude any. IF possible make a CPT especially for the table and use limited categories. Promises of wealth or exceptional biscuits might make me enhance this.
Pagination
I’m not entirely convinced by List.js pagination. I will tell you how it should work, and let you see if you think that’s accurate!
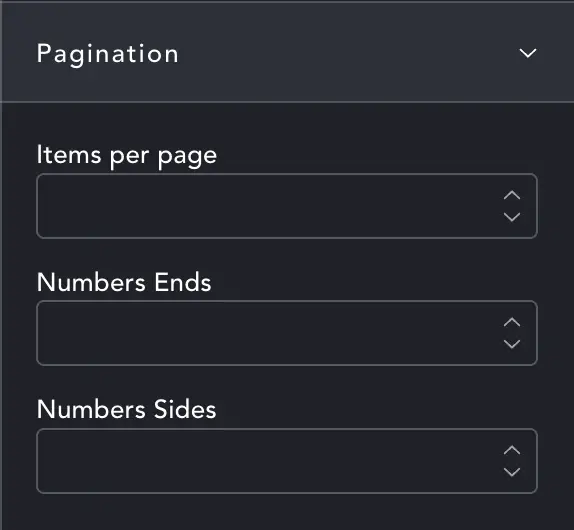
Items per-page is fine, it sets how many rows we see at once.
Number Ends / Number Sides – Controls how many page numbers appear in the pagination block.
Numbers Ends is the number of digits next to the end numbers. Numbers Sides – are the number of digits at the sides of the current item. It’s easier to see an illustration.
1 [numbers ends] … [numbers sides][current page][numbers sides] … [numbers ends] 50
So numbers ends = 3, number sides = 2, in theory will look like this.
(1) 2 3 4 … 11 12 (13) 14 15 … 47 48 49 (50).
(1) First page, 3 further numbers (ends) – (13) with 2 numbers each side (sides), (50) last, 3 numbers next to it.
Styles
The styles are pretty self-explanatory, except for one part which we’ll detail here.
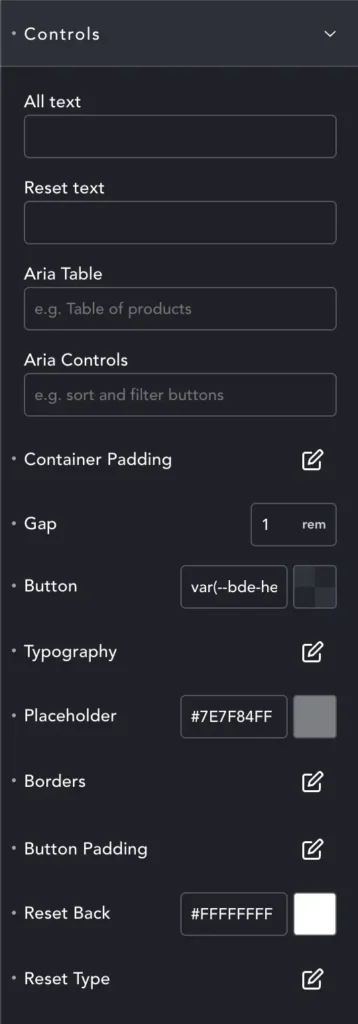
Controls
All Text / Reset Text – Text for the ‘All’ filter button and ‘Reset’ button.
Aria Table – Is the aria label for the table, to describe for assisstive tech what the table shows, like ‘Table of latest posts’ or ‘table of ingredients’. Default ‘Sortable, filterable table’.
Aria Controls – Is the Aria descriptive text for the control buttons. Default ‘Table search and filter controls’.
Both of these allow you to enter your preferred language labels, or a more accurate description than the default.
When you style the Button here, this applies to the Control, Filter and Link/Download buttons to ensure a consistent look.